Discover the Best 4 Pin Header Socket for Your Needs?
Choosing the right 4 Pin Header Socket is crucial for various electronic projects. This component plays a vital role in connecting different parts of a circuit. When selecting a socket, several factors come into play, such as compatibility, durability, and application.
Quality matters when it comes to 4 Pin Header Sockets. Look for options with a solid reputation. Brand reliability can be a game changer. However, it's important to note that not every product labeled as "premium" performs well. Misleading claims can lead to frustration.
Consider your specific needs. Are you working on a hobby project or a complex device? Reflect on your experience with similar components. Sometimes, what works for one project might not suit another. Make choices based on actual performance, not just marketing. Ultimately, the right 4 Pin Header Socket can significantly enhance your work, making attention to detail essential.
Understanding the Basics of 4 Pin Header Sockets
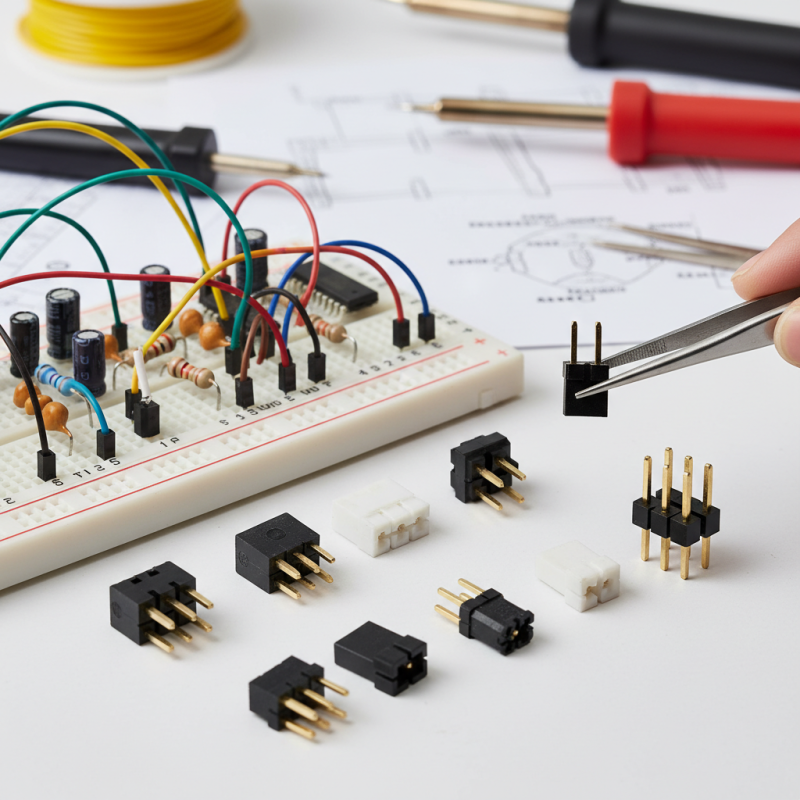
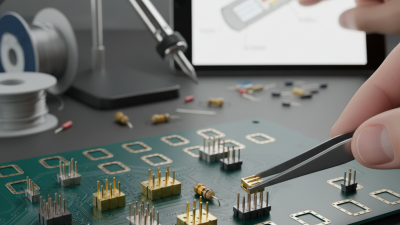
4 pin header sockets are crucial components in various electronic devices. Understanding their structure helps users select the right one. A typical 4 pin header socket consists of four contacts. These contacts allow easy connections for power, ground, or data signals. Their reliability makes them suitable for prototype development and circuit board design.
When choosing a 4 pin header socket, consider the pin spacing and pitch. Standard spacings are either 2.54mm or 1.27mm. However, not all designs are compatible. Knowing your specific application can prevent mismatches. Additionally, the material can impact durability. Most sockets are made of plastic and metal, but not all options provide the same strength or thermal resistance.
Some users may find themselves struggling with soldering techniques or installation tasks. A poorly soldered socket can lead to intermittent connections, while a well-installed one ensures robust performance. It's essential to practice and refine soldering skills. In the end, trial and error often lead to mastery, particularly with components like 4 pin header sockets.
4 Pin Header Socket Types Usage Comparison
Benefits of Using 4 Pin Header Sockets in Electronics
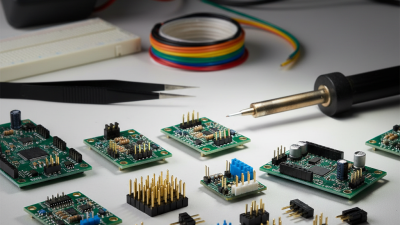
4 Pin header sockets are essential components in electronic devices. They connect circuits and facilitate communication between different parts. These sockets enable a reliable and stable connection that supports various applications. Users appreciate their versatility in different projects, from simple prototypes to complex systems.
One significant benefit of using 4 pin header sockets is their ease of installation. These sockets often feature a straightforward design. They allow for quick connections without soldering. This convenience is particularly beneficial for hobbyists and professionals alike. Additionally, they support the creation of modular systems. This modularity means users can easily replace or upgrade parts as needed.
However, not every application may suit 4 pin header sockets. In some cases, they might not provide enough pins for complex needs. Users should evaluate their specific requirements. Over-relying on these sockets can lead to limitations. Achieving the optimal setup may take time and experimentation. Ultimately, careful consideration ensures that the chosen header socket meets project demands effectively.
Key Features to Consider When Choosing a 4 Pin Header Socket
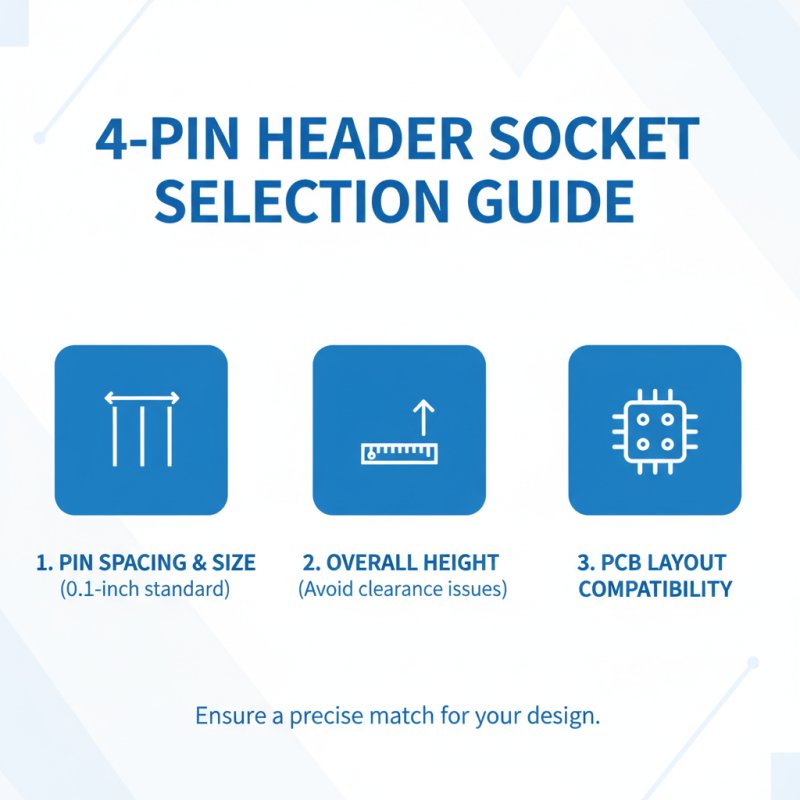
When selecting a 4 pin header socket, several key features play a crucial role. The pin spacing and size are essential for compatibility. A standard 0.1-inch spacing is common, but other dimensions may also exist. Ensure the socket matches your PCB layout precisely. Consider the overall height as well. Taller sockets may cause clearance issues in certain designs.
Material quality is another important factor. Heat resistance and conductivity can affect performance. Look for sockets made of durable plastic with metal contacts. The contact plating can also influence reliability. Gold plating, for example, offers excellent conductivity and corrosion resistance. Check specifications to find reliable manufacturers and materials.
Not every socket will work perfectly in every situation. Some may fit but offer weak connections. Others might be overly rigid or hard to insert. Testing a few options can help identify the perfect fit for your project. Additionally, consider long-term usability. A good socket should withstand numerous insertions without degradation. Your choice can affect the longevity and stability of the entire system.
Popular Types of 4 Pin Header Sockets and Their Applications
4 Pin header sockets are essential components in many electronic devices. Understanding the different types can help you make informed choices. One popular type is the single-row header socket. It’s often used in compact applications where space is limited. These sockets are typically found in Arduino boards and other microcontroller setups.
Another type is the dual-row header socket. This design allows for higher pin density, making it useful in complex circuits. It is commonly applied in PCBs where multiple connections are needed. Dual-row sockets provide a more stable connection, reducing the risk of signal loss.
While these sockets are widely used, not every project requires the same type. Consider your specific needs before making a choice. For instance, a compact device might benefit from a single-row socket, while a more complex setup may require a dual-row option. Reflecting on these factors ensures you select the right socket for optimal performance.
Discover the Best 4 Pin Header Socket for Your Needs
| Type |
Specifications |
Typical Applications |
Connector Style |
| Standard 4 Pin Header |
2.54 mm pitch, 4 pins |
Microcontrollers, sensor interfaces |
Straight |
| Vertical 4 Pin Header |
2.54 mm pitch, 4 pins |
PCB connections, power and signal transfer |
Vertical |
| Right Angle 4 Pin Header |
2.54 mm pitch, 4 pins |
Display connections, compact design |
Right angle |
| Stackable 4 Pin Header |
2.54 mm pitch, 4 pins |
Expanding functionality in prototyping |
Stackable |
| Solderable 4 Pin Header |
2.54 mm pitch, 4 pins |
Permanent connections |
Soldering |
Tips for Proper Installation and Maintenance of Header Sockets
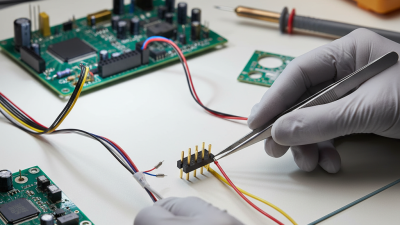
When working with 4 pin header sockets, proper installation and maintenance are key to ensuring functionality. These components are often used in electronic devices, offering connectivity for various applications. A poor connection can lead to malfunctions. Thus, attention to detail is crucial.
Tips for installation include ensuring the socket is oriented correctly. Pin alignment must be precise to avoid damage. Use gentle pressure while inserting connectors. If the connector does not fit, check alignment instead of forcing it. Regular inspection is vital. Look for signs of wear or corrosion, as these can impair performance.
For maintenance, keep the socket clean. Dust accumulation can lead to unreliable connections. A soft brush or compressed air can help remove debris. Consider the environment too; excessive moisture or heat may affect durability. Use protective covers if needed. Even minor oversights can lead to significant issues later.

 Email
Email WeChat